Uploading to PRMG
Sending files to Paramount Residential Mortgage Group (PRMG) through Processor's Toolkit (PTK) uploads the subject files through PRMG's ImageFlow system. This is their internal system for receiving and organizing incoming loan documents from brokers.
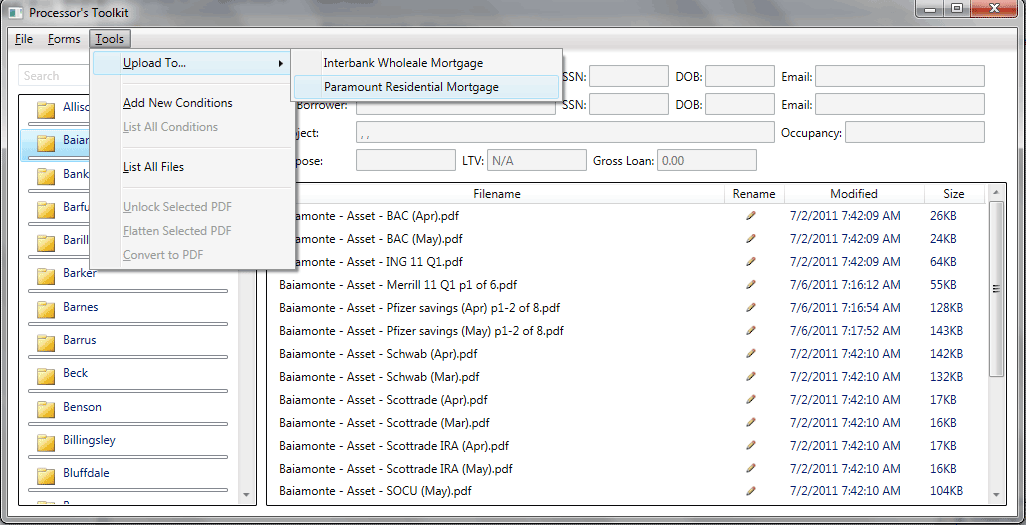
Step 1
Begin by clicking on the "Tools" item at the main menu, then selecting "Upload To.." and then click "Paramount Residential Mortgage".
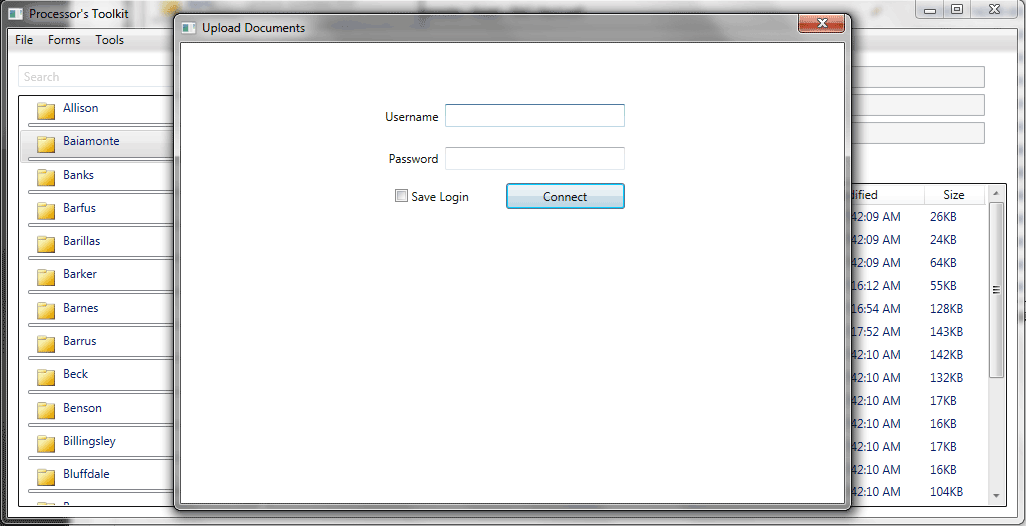
Step 2
Enter your PRMG username and password. These are the same credentials you use to log into the website at http://prmglending.net. Optionally select "Save Login" for future use.
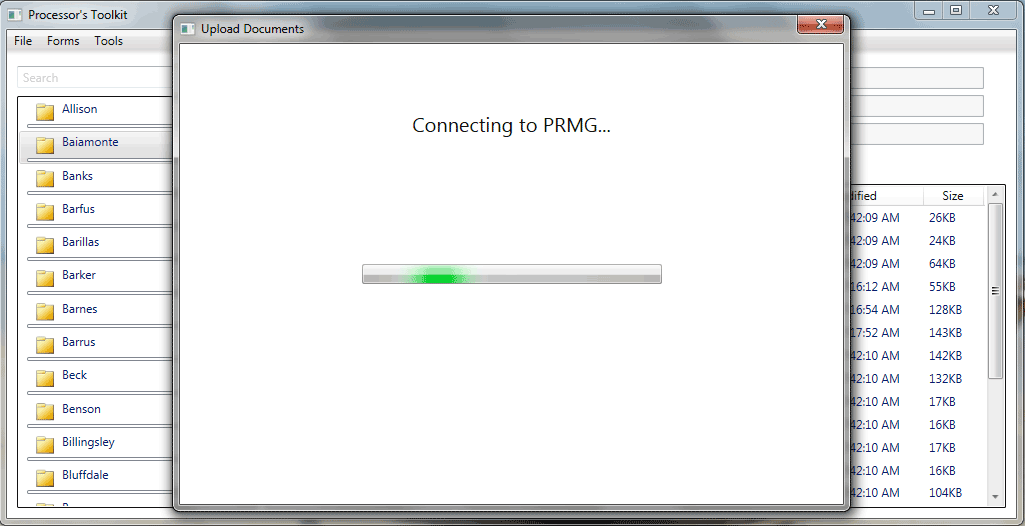
Step 3
After clicking "Connect" in Step 2, PTK will attempt to log into the PRMG website.
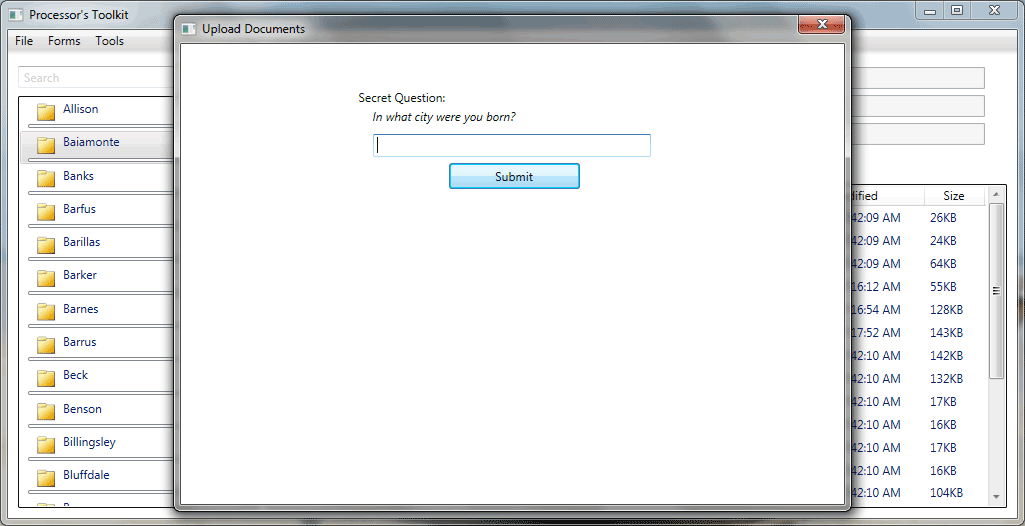
Step 4
If PTK was able to retrieve the PRMG homepage and your username is valid, it will present you with one of the challenge questions on file with PRMG. Enter the answer and click "Submit".
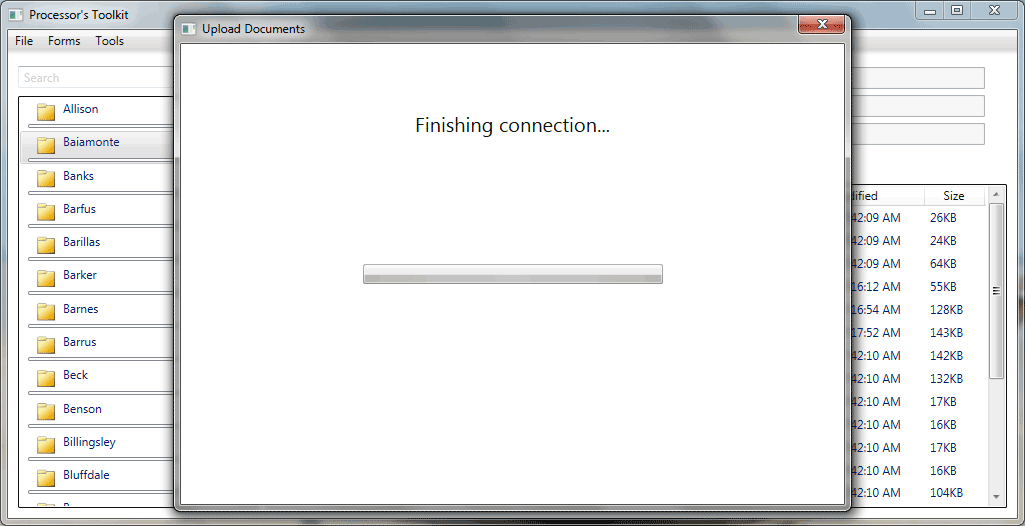
Step 5
PTK will then post your challenge question's answer and password to complete the login process.
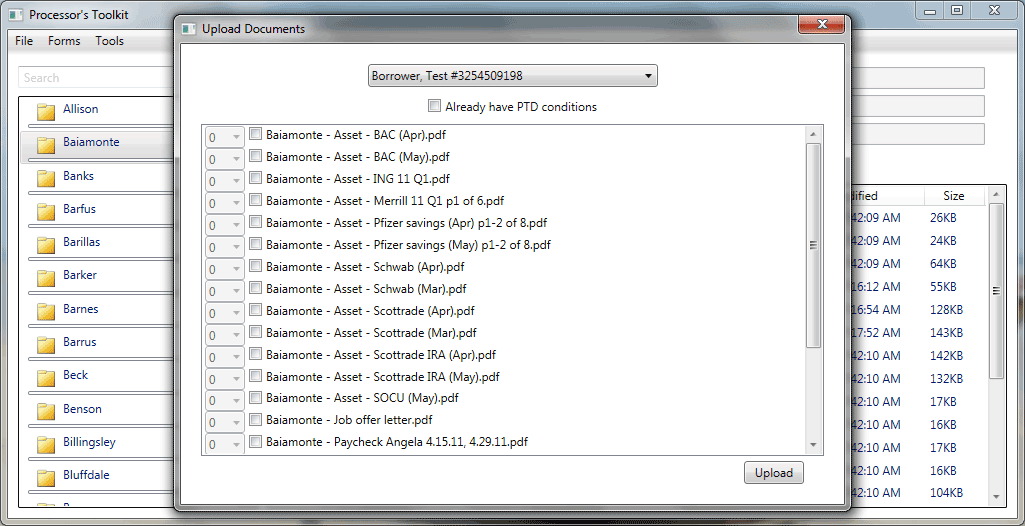
Step 6
If the login completed successfully and PTK was able to connect to ImageFlow, you'll be presented with a drop-down menu with your available loan files. If a borrower name was found that matches the source loan folder on your computer, it will automatically be matched. If no selection is made, click the small down arrow of the menu to manually select your borrower.
If this is a loan submission: Leave the checkbox "Already have PTD conditions" unchecked. When uploaded, files will be marked as submission documents. Check the files you wish to upload and click the "Upload" button.
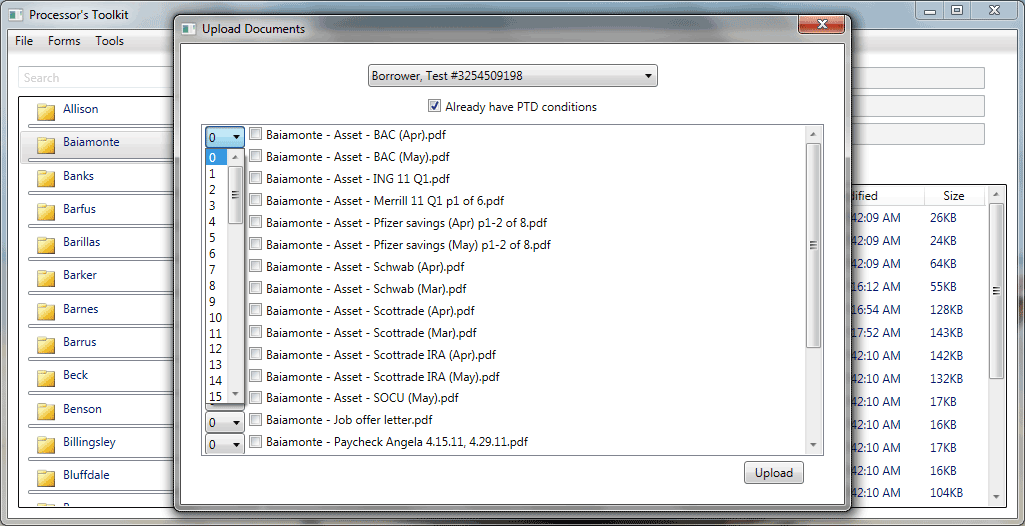
If you have already received your PTD conditions: check "Already have PTD conditions", which enables the selection of condition numbers. This is recommended as it eases the sorting by the processor on the receiving end. Once you've checked and assigned condition numbers to the files you wish to upload, click the "Upload" button.
Step 7
After clicking the "Upload" button in step 6, PTK will work through your file queue until completed. Files highlighted in blue are in-progress, green are finished, and red have failed.
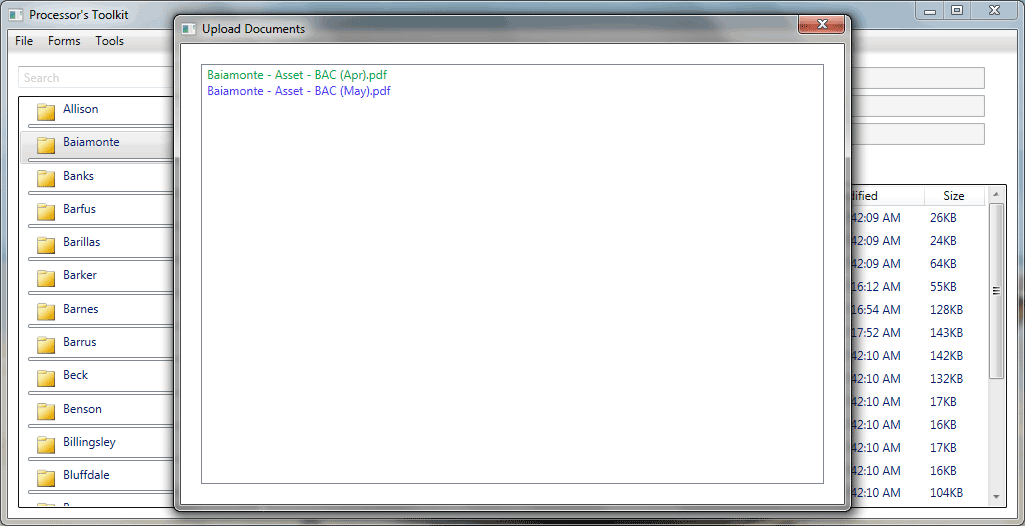
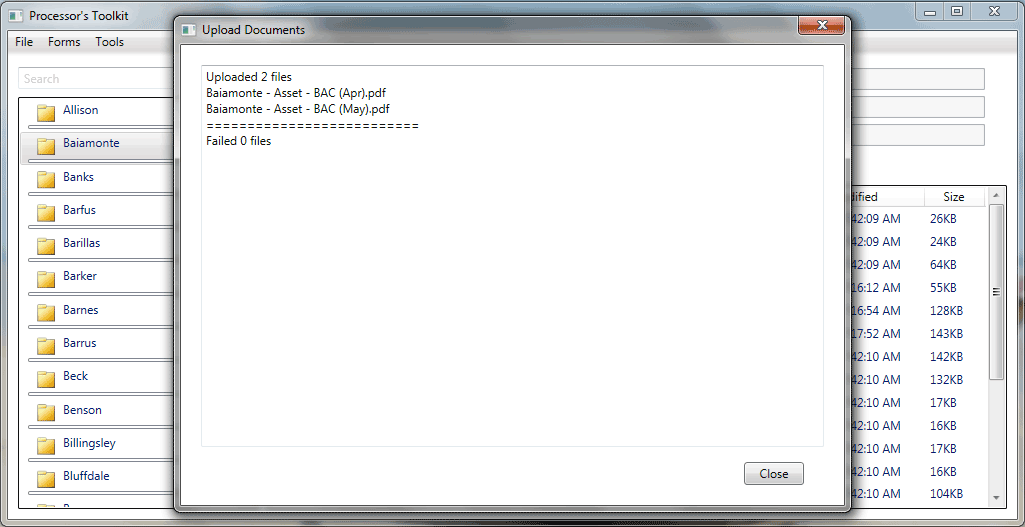
Step 8
Once the file queue has completed, the window will present its results. This text can be selected, copied, and pasted into an email to your respective branches submission's or condition's email address to alert them of the new files. Click the "Close" button when finished.